Showing posts with label make up how to. Show all posts

Wednesday, July 15, 2015

STAGE MAKE UP FOR DEEP SET AND HOODED EYES

-->  
Work with the shape of your eyes by lengthening them instead of trying to widen them.  Photo: Maharet Hughes

 I get so many questions about stage make up for deep set and/or hooded eyes that I'm re-posting this article that was originally published in 2010. If you're a "hoodie"(like me) I think you're gonna love this! Enjoy...

Onstage, a dancer’s face is every bit as important as her body. As performers, it’s imperative that we convey emotion to the audience, and without a well made up “stage face”, that task is nearly impossible. I have always been adamant with my students about the importance of wearing appropriate stage make-up.

When I perform, depending on the venue,  the make-up I wear runs the gamut from Standard Stage Face to Ridiculously Over The Top Extravaganzas… yep, that means I like to pile it on, with all the bells and whistles! Of course, like most women, I enjoy playing with make-up in my “civilian” life, especially if I am going out at night. But contrary to popular belief, I don’t go overboard with cosmetics 24/7, I do give my skin a rest on  my days off. Much to my amazement, even when I am wearing just a little make-up on the street or in class, people shower me with compliments on my “beautiful big eyes”, my “ exotic cat eyes” and my “bedroom eyes”. 

Why does this surprise me? Because, as the late magician Doug Henning was so fond of saying,

“It’s an illusion!”

My eyes with  no make up at all
Have a look at the pictures here, and you will see my eyes with and without make-up. In truth, my eyes are small. Very small. They are also narrow, almond-shaped, deeply set, extremely hooded and they actually turn down at the corners. If you want to get all scientific and official about it, my eyes have a very pronounced Epicanthic Fold…. which sounds a lot more exciting than it actually is. The Epicanthic Fold is a common genetic trait among many Asians, Eastern Europeans, Native Americans, and Pacific Islanders… and since I am an American Mutt with at least two if not three of those gene pools, I got hooded eyelids in spades- more than anyone else in my family, who all have big, wide peepers.

My Epicanthic Fold is so extreme that when my eyes are open, none of my eyelids visible at all…and my eyelashes actually recess back into the fold as well. On my face, the Epicanthic Fold looks almost like Asian eyes, but the area above my eyes is puffy, not flat, and always has been. People have often speculated about my ethnicity because my eyes are not an average shape.

With "civillian" evening make up
Growing up, I suffered severe Eyelid Envy, and always wanted “normal” eyes, with big lids and cool eye sockets that made hollows under the brow bone. We always want what we don’t have, right? I flat-out HATED my eyes-and all the brutal teasing I endured in school because of them- with a passion. That is, until I discovered eye make-up. When I turned twelve, one of my mother’s theater students gave me a little tin of Mary Quant Eye Crayons and a tube of mascara… and my life changed forever. I learned, through trial and error, how to turn a “flaw” (my hooded, deep-set eyes) into an asset. Suddenly both men and women were drooling over my exotic eyes.

I got so good with make-up and wore it so consistently that once I even fooled my landlord of four years into thinking I was someone else. He came to demand the very late rent; I answered the door sans make-up, and he had no idea that I was!

“ Please tell her I stopped by”, he said, earnestly. I closed the door, amazed that he didn’t recognize me. Ah, the power of make-up!

As an adult, I realized that many women have eyes exactly like mine, or eyes that share similar traits. Out of curiosity, I looked up some tutorials for hooded eyes on You Tube. Yes, there are many of them, but sadly, most of the videos seem to get the make-up application all wrong. They mostly focus on creating the impression of a lid or crease, which to me just looks kind of weird. They try to “bring out” the eyelid by applying a lighter shadow there-, which might work theoretically, but is absolutely useless if your hooded eyelid recesses under your Epicanthic Fold. 

There is such a dearth of information on applying make-up for eyes with this unique shape, I thought I’d share some of my tips and tricks. They will make your eyes look strong and exotic onstage, and you can use fewer products and a lighter touch for an every day look as well.

If you have hooded eyes, don’t believe all the “experts” who say that dark eyeliner will make your eyes look smaller. Au contraire- dark liner, ringed around the entire eye, will actually make your small eyes look much bigger. If you don’t believe me, try this on only one of your eyes, then look in the mirror and see what a difference the dark liner makes! Don’t be afraid to play around and experiment, you will probably need a few tries before you get comfortable with it.

First of all, instead of trying to “draw the lid out” from the hood with a lighter shadow, line the entire eye with a dark color. You can use black, dark or light brown, deep blue, green or grey- the color doesn’t matter- it’s the deep richness and darkness that does.Make sure you use a powder eye shadow and a soft thick eye shadow brush, not a sponge applicator, which tends to feel almost sharp, and doesn’t hold as much product. Get a lot of pigment on your brush, tap the brush or blow on it sharply to remove the excess powder, and line the entire upper and lower lids, working from the roots of the lashes outwards. I do this with my eye shut, working the shadow well into the lash-line. Making sure that the entire upper and lower lids are covered evenly, I then fade the dark color up above the crease onto the hood, or Epicanthic Fold, for a smoky effect. 

In order to make the most of your narrow, lidless or hooded eyes don’t fight their shape; work with it, instead of against it. Trying to fake a crease will probably only make you look weirdly surprised, or like you have raccoon eyes! Instead of trying to create the illusion of a crease, or wide-open eyes, go for extending the length of your eye. Applying the powder shadow a bit past the outer corner can do this. This can be done a few ways: by applying the shadow straight across, by adding a bit more shadow in a V-shape smudged at the outer corner, or by winging the shadow sharply upwards along your the hood of the eye for a cat-like effect. For stage, I always use a black liquid or gel liner to intensify this lengthening effect, especially on the lower lid. Personally, I don’t always use eyeliner extended outwards on the upper lid, because on my eyes (and perhaps also on yours, depending on how hooded they are) the upper line won’t be really visible. It might work for you, though, so try it out on both top and bottom.

From the center point of my lower lid, at about the middle of the iris when I am looking straight ahead, I use my eyeliner to draw a thin straight line over the powder shadow and extending outwards, to just beyond the edge of my eye. I then take white liquid eyeliner, and draw a thin line of white just above the black liner. From up close, this looks a little strange, but from the stage, it actually tricks the audience, giving the impression of extending the whites of your eyes, making them appear much longer-and larger- than they actually are. You can also use a soft eye pencil in white (MAC makes a great one) or use some frosty or matte white powder shadow applied with a thin brush, for the same effect.
If your eyes are hooded, chances are that once you open your eyes, your natural lashes will almost disappear. For every day wear, using an eyelash curler with a few coats of mascara may help make them more visible, but for stage, false eyelashes are essential. There is nothing that highlights and frames your eyes better than faux lashes and they look lush and gorgeous. 

If you have never used false eyelashes before, you may be a bit apprehensive, but once you get the hang of it, the application is simple. Many newbies tend to opt for a lash that looks natural, but if you’ve got hooded eyes, a shorter lash just won’t cut it, it will get lost as easily as your natural lashes will. It’s length and volume you’re after, so bigger is better! That being said, if you haven’t used false eyelashes before, they may feel a bit heavy on your lids, so try a medium sized lash and work your way up to full blown drag-queen length slowly.

Most faux lashes are manufactured to be intentionally too long length-wise, so they can fit a variety of eye shapes and sizes, so trim them if you need too. The outer ends generally are longer, so trim the lash from the shorter hairs on the band, the part that will sit on the inside corner of your eye. Some faux lashes are designed especially for Asian eyes. Instead of the lashes being longer on the ends, these are longer at the center, and tapered on each end and they look terrific on hooded eyes. A friend brought me some Korean eyelashes that were shaped this way, and I wore them until they disintegrated. Unfortunately, since the label on the box was in Korean, I have no idea what they were called! Some brands available in the USA that make false lashes which are longer in the center are Japonesque and Sonia Kashuk, whose make-up line can be found at Target. You could also try hunting down lashes like this at Asian beauty supply stores, or finding them  on the Internet.
After you’ve trimmed your lashes, roll the band of the lash around a little with your fingers to make it more pliable, so that it will conform to the shape of your lid more easily. Apply a thin band of glue to the base of the false lash, (you can do this with a toothpick, painting it on the band to avoid any big glops of glue getting onto the lashes themselves) and let the wet glue sit for at least 30 seconds, even up to a full minute or two, until it gets tacky. The brand of the glue, or the amount you put on the lash will determine how quickly it dries, as will the climate. If you are in a humid area, (or are doing your make-up in a small dressing room full of sweaty dancers) it may take a little longer to get tacky enough to use. The most common mistake most people make when applying lashes is trying to stick them on when the glue is too wet. 

I recommend "DUO" lash glue in clear/white, or Revlon's Precision Lash formula because they hold extremely well and are also the least irritating of any brand I've used. Clear glue will dry invisibly, making any mistakes less obvious. To apply the lash, sit it on your upper eye-lid, just above your natural lash-line. Press down lightly in the middle first, and then tap the lash down lightly towards inner and outer corners. Keep your eye closed for a moment, to let the glue take hold. You may have to gently press the lash upwards, towards your brows, with the pad of your index finger. This will give a more “open” look to your eye.
Many women cut the lashes in half, and use them only from the center of the eye to the outer corner for a wide, doe-eyed effect. Also, the lashes are a little easier to apply this way, and this technique will also aid in the producing a cat-like look.

Your eyebrows are very important for expressing emotions on stage, so make sure they are accented too. I like to use a stiff, slanted eyebrow brush and powder for eyebrow shaping, and also to fill in any bare areas. Use light, feathery strokes, and follow the natural shape of your eyebrow. You can also use an eyebrow pencil, but make sure it’s sharp, and again fill in and darken up your brows with feathery, short strokes. To add a lift to my entire eye area, when I am doing make-up for the stage, I usually extend the brow upwards and outwards towards my temple at the outer edge.
Heavy brows sitting over hooded eyes tend to make them look smaller, so if you have very thick eyebrows, you may want to have them shaped by a professional.

After I’ve done my brows, I finish up by contouring the hooded area just under them. I cover the inner corner of my eyes under the brows with a powder shadow shade that is a little darker than my skin tone, or in the same color family as but a little lighter than the shade I used to lie my upper and lower lids. I then add frosty white powder shadow as a highlighter just under the brow from the middle of the eye, extending it to the outer corner. I generally tend to keep the highlight thin, because on hooded eyes, a lighter shade spread over the hooded part will only accent its puffiness more. Sometimes I add a little bit of pearly white powder shadow to the area just above the tear ducts, or inner corner of the eye. For stage, I often use a small dot of white liquid eyeliner here- again; an effect that looks kinda bizarre up close, but it really opens up the eyes (by making the whites appear bigger) for the stage.  
Close up of some really insane stage make up; note the white at the inside and outside corners

If you’re a “hoodie” like me, take some time to play with make-up, and see what works for you. Fool around with colors, and with different techniques for shading, lining and shaping. You’ll learn to love your unique, exotic eye shape. 
 
And who knows… maybe one day some chick with huge, round eyes with big lids and fantastic eye sockets will probably sigh in envy, telling you she wished she had your wonderful, exotic eyes!


#
 Purchase my  instructional  stage make up  DVD  “Bombshell: Dramatic Make Up For The Stage, Photos And Glamourous Occasions” here: 

-->
Description: https://mail.google.com/mail/u/1/images/cleardot.gif


Tuesday, December 17, 2013

PAINT IT BLACK: MAKE UP TIPS AND TRICKS FOR FEMME FATALES


May favorite onstage look: dramatic, lush-lashed coal black eyes and over-lined lips


 We all know how the classic Little Black Dress is always an elegant but extremely sex-aaaay wardrobe choice, right? Well, for a really arresting look for the stage or Holiday parties, there’s no way you can go wrong with black make up. Black eye make up is every bit as timeless as The Little Black Dress. Alluring and exotic, it has been used for centuries, from the application of   kohl eyeliner in ancient Egypt  (which was allegedly Cleopatra’s secret weapon of seduction) to modern times. Velvety black eye make up calls to mind the smoldering intensity of 1920’s silent film stars and legendary vamps like Mata Hari…as well as the bad-girl sassiness of early 1960’s girl groups like The Ronnettes. In the 1970’s, lush liner and thick false eyelashes adorned the lids of everyone from Raquel Welch to the stars of Valley Of The Dolls. More recently, starlets like Kristen Stewart and Taylor Momsen have rocked pitch black eyes to great affect.

 The key to beautiful black eyes is shading. If you get very graphic with your application, you’ll wind up looking too Goth- and unless that’s your intention, you need to make sure that you blend your black eye make up carefully, which will soften it up a bit, but still retain the intensity. 
Metallic smoky make up in shades of black, silver & white

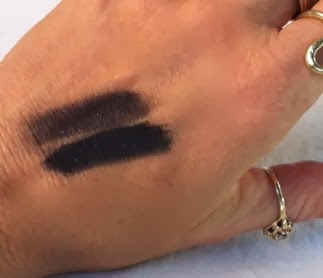
When I use black shadow, I always prefer a pearly or iridescent shade, because when water is added, it magnifies the color. A matte shade doesn’t work this way; it can’t be made wet because it will just look muddy.   Also, any type of pearly or iridescent eye shadow will work, even drug store brands. I prefer using Nars Nightbreed (a gorgeous black shadow flecked with tiny specks of silver glitter) but Urban Decay and even Wet And Wild both have a black pearly, sparkly shadow that works almost as as well!

First, I apply the shadow dry, all over the lid with a small brush, really working it well into the roots of lashes. Next, I brush upwards, into and above the crease in my eye, blending it well, and sort of swooshing the outer corner of the eyelid upwards and outwards. Then I line the bottom lid with the same dry shadow, and bring it up at the outermost corner to meet the top lid’s extension, so that it creates an inverted sideways  “V” shape.  After that, I go over the lid with a soft brush full of the black shadow that I carefully wet then pinch dry before applying to the top lid and just barely above the crease. It will be layered over the dry shadow, creating a smudged, smoky effect.
Pearly black shadow dry, and intensified by wetting it

 Next, I add on thick lashes to the top lid, then line the top and bottom lids with MAC’s Blacktrack gel liner, though a soft black pencil would probably work just as well. After the liner has dried-or just after the pencil application-I go over the liner with a small, soft brush loaded with the dry iridescent shadow. This diffuses the harsh line and makes it softer and thicker. Finish this look up with a pearly white powder shadow highlight just under the eyebrow at the outside corner, and you’ll be good to go!  For a bit of glitz, lightly dip your dry fingertip into a pot of MAC’s Reflects Pearl cosmetic glitter, and pat it on carefully to the white highlighted area. Because the glitter is applied dry, it will “migrate” just a little, adding a touch of sparkle, which will show up under any sort of lighting.  This looks terrific either onstage or for Real Life.  The reason I love this particular glitter so damn much is because it is so highly reflective…it’s truly my favorite glitter ever. The individual flecks are large enough to really catch the light, but not too big, so they don’t give you that over-the-top Hot Mess At A Club look. I’m not being facetious when I tell you that I (seriously!) have a container of Reflects Pearl in my earthquake kit…cause if there’s a Global Apocalypse, I want to look good!

Teal shadow by itself, and  mixed with black

Red shadow by itself,and mixed with black
Still another way to use black eye shadow is to mix it in with other brighter colors. This will tone the colors down a bit, but they’ll retain their richness and make them more complex.  I like to mix black pearly shadow into emerald green, dark blue, teal and even red. Red eye shadow on it’s own will look crazy and garish, sickly or clown-like… trust me, you do not want to use it on it’s own!  But mixed with black, it’ll create a soft burgundy color that creates a sophisticated smoky eye look. Words to the wise- don’t get the red shadow close to the lash line. It can cause eye irritation in some individuals. When you mix the red and black shadows, stipple in the red above your eye crease, and blend it onto the outside corner wing.

 You can even use black on the lips- sounds crazy, I know, but it looks incredible!  Think of Tim Curry, as Doctor Frankenfurter in The Rocky Horror Show, but you’ll definitely want to go a little less extreme. What you’re after is a sculpted, kissable look. Apply the red lipstick first… and use a nice red with blue- as opposed to orange- undertones. 


This looks amazing on every skin tone from the ghostliest pale to richest brown; not only that, the blue tones in the red will make your teeth appear brilliant white! Blot the lipstick just a little, then take a soft black pencil and line the outside of your lips. Shade in the corners of your mouth, too. Then apply another coat of the red, and if you need to, smudge and blend the black into your lips with a lip brush or your finger.  For a party, apply a little bit of clear gloss only to the bottom lip at the center for a bee-stung look.  If you’re going to wear this look onstage, forego the gloss and use a small dot of pearly white, light pink or even gold eye shadow to create the same illusion.

 Remember, cosmetics are the most instantaneous and temporary changes we can make to our appearance, so don’t be scared, just take an hour or two to experiment and have fun playing!


 For more make up  tips and tricks, try my  instructional  DVD 
“Bombshell: Dramatic  Make Up For The Stage, Photos And Glamourous Occasions” available here:


Tuesday, December 6, 2011

BODY CONTOURING 101: SHADOWS AND HIGHLIGHTS


You contour and highlight your face to accentuate your features before you go onstage to make them stand out or recede.

For dancers,especially when wearing costumes that show a lot of skin, the same techniques can be applied to the body, to accentuate your muscles and curves.

It’s a pretty simple process: whatever body part is lighter will stand out, and those that are darker will recede.

With a full, fluffy brush, apply a thin stripe of pearly white, pinkish bronze or golden highlighting powder down the center of the arms and legs to make them look longer. While you’re at it, dust some of the same powder around the curves of your shoulders,and lightly across the tops of the breasts to make them appear fuller and more prominent.

Shading and contouring is just as easy. For this, you will want to use a matte color. Stay away from pearly or frosty cosmetics, because they attract light, and you will be using your contouring colors on areas which you want to appear to be shadowed.

Use a slightly smaller brush than the one you used for highlighting to dust on a darker contouring shade to the places you want to recede. A rosy brick tone or bronze color that is a shade or two darker than your own skin usually works well for people with fair to olive skin, but using matte brown colors will appear muddy on fair to olive skin. If your skin is darker, don’t be afraid to use deeper, richer browns, but make sure to keep the contour color just a couple of shades darker than your own skin tone.

Drawing a soft, smudged line in the center of your cleavage will accentuate it and make it seem deeper. Make sure the actual line isn’t visible- blend it well.

For the torso, softly brush the contour color you’ve selected onto all the spots that you want to underscore and shadow, giving the impression of more muscle tone.

Royal Secret Alert: since I do a lot of abdominal work when I belly dance and want to accentuate it, I do this all the time!

Using my contour color, I start by drawing a thin, faint line down the center of my abdomen from the cleavage to my navel, along my abdominus rectus, the long muscle that runs the length of the torso. Then I draw two more vertical lines, one on each side of the muscle.

I suck my breath in hard, look in the mirror, and brush soft contouring color into the hollows that have formed under my top ribs. I start near the center of my bra, and shade the color out towards the sides. After that, I brush on diagonal lines up the inside crest of my hipbones, pointing outwards to accentuate the cut in my obliques to make them seem more defined.

Without blending the contouring color, it will look like you have a long diamond shape drawn on your torso, with three lines up the center, dividing it. Once you blend the darker shade in and soften it up a little, brush a little translucent powder over the whole area to blend it even more. Believe me, it’ll look like you have fantastic abdominal muscle definition, especially in a dark restaurant or on a bright stage.

When I use this trick, people in the audience always comment on how ripped my torso looks…but then, those same people also tell me I have gigantic eyes, too!

All make up–but especially stage make up-is an illusion…so why limit the beautiful fantasy to your face?


PHOTO: Princess Farhana at the Las Vegas Belly Dance Intensive, 2011 by Taboo Media

Costume by Princess Farhana For King Of The Nile
http://www.kingofthenile.com/products.asp?cat=Princess+Farhana+Costumes

Sunday, December 4, 2011

MERRY MAGPIE CHRISTMAS!


My entire house looks like a really messy backstage, it’s full of costumes and headdresses, swords, opera-length gloves, feather fans, Isis Wings, silk veils, fan veils, glitzy ballroom shoes, you name it.

That on it’s own wouldn’t be a big problem, except for the fact that my closets, shelves, and drawers are loaded down with yards of shiny materials and sequin trims, beads, rhinestones, bugle bead fringe, loose feathers and coins… not to mention broken jewelry, scraps of lace, hunks of rayon chainette fringe, a random foot of 4” wide organza ribbon, mis-matched drapery tassels, random buttons and Mardi Gras beads.

Yep, I’m a magpie, attracted to bright and shiny objects...which I take back to my "nest" on a regular basis!

Every so often, I have a kooky fantasy that the television show “Hoarders” will call me to offer me a starring role in an exclusive dance-centric episode, but so far…that hasn’t happened.


But I like to recycle and re-purpose these things-every day objects- into costumes, props and accessories. So instead of holding onto all this dazzling stuff, I like to make Christmas stockings for all of the kids ( and adult kids) in my life: my nieces and nephews; my dancer and civilian pals and their kids, too.

Some of my friends call me “The Showgirl Martha Stewart”, but I wasn’t the originator of these stockings.

This holiday tradition started with my Grandma Nelly, who was an ardent crafter; she fashioned beautiful sparkly felt stockings by hand for all her grandchildren. My mother continued this lovely custom, and every year I get out the blue Christmas stocking she so lovingly made for me, marveling that the little evergreen tree still has every pearl and sequin “ornament” intact!

I love carrying on this magical legacy, and you can do it too- because they’re so easy, and lots of fun to make!

First, have a look through your craft supplies, and see what you have- pretty much anything sparkly, shiny or bling-blingy will do. Make sure you have a needles and thread, craft glue and a glue gun on hand, too.

Gather all your bits and pieces together, then start thinking about which you’re going to make your stockings for, picking out a design that will delight your recipient. Sketch out your idea, and then start figuring out which leftovers will work best for your stocking(s).

I created all the stockings pictured here, and had a blast doing it. The peacock stocking was for one of my sisters, cause she was really into peacocks- and silhouettes. And of course, the person who got the Obama stocking was obsessive about our president! Ho-Ho-Hope! The pink stocking with the Egyptian motif was for the baby daughter of my dear friend Bahaia, the Texas-based belly dancer; the pink stocking with the horse on it was made for my niece who loves to ride, and the kitty was for my boyfriend, who calls himself “Mr. Crazy Cat Lady”!

After you’ve gotten your design together, cut out a large, simple stocking shape from a double thickness of felt, using a pinking shears or even just a regular scissors- the felt won’t ravel. My Grandma Nelly probably started off using felt because it doesn’t have to be hemmed…it’s also inexpensive and quite durable.

I make my stockings about 12” wide at the top, and about 15”-18” long at the bottom, where the foot shape is. They hang about 17"-20” long. With these measurements, you can actually fit little stocking stuffer presents inside the stocking before you give it as a gift.

Next, lay out your design on the felt, pin it down, and hand-sew ( or glue) the embellishments to the felt. Since I’m a confirmed glitter addict, after I’ve done this step I glue tons of rhinestones on top of all the designs!

Add any trimming you like to the top- wide ribbon, thick braid or sequin trim is always good to use, and those leftover pieces of fringe work very well here- attach the fringe, then put the trimming over it.

With embroidery thread or dental floss, hand stitch the stocking sides and bottom closed.

Last, sew on a looped length of pearls-by-the-yard or a doubled tab of ribbon to one of the corners at the top, attaching it on the inside. This way the stocking can be hung on the mantle... with care, of course.


If your hand sewing skills aren’t that great, you can machine stitch the stocking around the edges if the decorations aren’t too close to the borders. Or, if you just don’t have the time to make the stocking shape, just buy an inexpensive plain stocking- there are scads of them everywhere- and then custom decorate it.

Last: when you leave out cookies and milk for Santa, make sure to add in a pair of sunglasses for him, because if you’ve made the stockings in true showgirl style, they’re gonna be so bright, he’ll need shades!

Friday, September 30, 2011

A DANCER’S QUICK REFERENCE GUIDE TO THEATRICAL LIGHTING


Theatrical lighting enhances stage performances in many different ways. Through the use of colors and intensity, good lighting can set a mood, it directs attention to-or away from- a certain performer or place on the stage, it can take the place of scenery, mark the passing of time, or even be used to enhance the action onstage, or move a plot along.

Lighting can make or break a performance, turning an average piece into something special, or even turning a beautiful and technically perfect dance piece into something mundane- or worse, something that cannot even be seen!

Lighting technicians used to change the moods onstage manually, but nowadays, many theaters are equipped with computerized lighting boards that can be programmed to change in a split second.

While not all dancers regularly perform in a proper theater with state-of-the-art lighting, it is still a good idea to be familiar with some working knowledge of theatrical lighting.

Have you ever experienced this all-too-familiar exchange?

Question: “What kind of lighting would you like for your piece?”
Dancer: “ Um…. I’m not sure…?”

With a little bit of know how, you will be able to decide exactly what sort of lighting you would like for your dance piece, lighting that will enhance your performance and make you look beautiful…or menacing, innocent, young, old, remote, friendly and accessible or even as grotesque as you want!

While this is by no stretch of the imagination any sort of complete guide, it’s a quick 'n' dirty, easily memorized guide to the basics of theatrical lighting.


House Lights
These refer to the lights in the actual theater, not the lights on the stage. The house lights illuminate the entire audience area, and can include everything from chandeliers to sconces on the walls, and the runner lights on the floor that illuminate the walk ways and aisles. House lights are often controlled by the theater’s lighting designer, and can be dimmed or brought up before and after the performance, as well as during intermission.

Work Lights
Work lights refer to the lights that are on ( both onstage and in the house) for the cast and crew to work by during a rehearsal or tech-check, while the theatrical lights for the performance are being set up.

Spot Lights
There are many different varieties of spotlights, but they all have one thing in common: they focus an intense beam of light directly onto a performer or place on the stage. A follow spot is mounted on a moveable base, so it can literally follow a performer around the stage, continuously illuminating the individual. A pin spot directs a very narrow beam of light onto a person or place on stage.

Fill Lights
Fill lights and side fills are supplementary lights, usually used to lighten up the shadows cast across the performer’s features.

Accent Lights
The type of lighting used to accent a person or a place on stage, to make it stand out. Accent lighting may be done with colors or with intensity- a spotlight is basically an accent light.

Black Out
This term refers to a total absence of lighting on stage. Many performances begin and end in a black out, while the cast members walk on and off stage. There should ideally be a small mark on the floor done in glow-tape or fluorescent paint at center stage, so it can be seen it in the dark and help performers get their bearings as they step into place. Whenever possible, have a stage hand or the lighting tech make a separate mark on the floor for you if you are beginning in place on stage anywhere other than center.


Wash

A “wash” refers to the mix of lights being used onstage at any given time.


Gel

A gel is the thin sheet set across the front of light to alter the color of the light. Nowadays, gels are commonly made of plastic, but “back in the day” they were originally made of gelatin (from animal tissue) hence the name.

Gobo
A Gobo is a generic term for any sort of opaque object placed in front of a light to block a portion of the beam, or the entire beam of light.

Pattern
A Gobo with any sort of design cut into the surface. When placed in front of a beam of light, the patterned Gobo projects the design onto the stage.

Colors of lights and/or gels, and the effects they will have on skin tones, make up and costumes:

Black Light/ UV Light
Black light, UV, or Ultra Violet light, this is a bluish- purple light used for theatrical effects, and will highlight white or fluorescent-colored costumes and props, such as hula hoops or juggling clubs.
Black light is often used for psychedelic effects at parties and nightclubs. Aside from the fact that it makes almost any skin tone appear lavender to dark purple, it also evens out the skin and makes it appear flawless, and makes teeth appear glowing white, which is why so many “gentlemen’s clubs” use UV lighting. However, black light or UV light onstage is so unnatural and unusual, that on a stage, it should be used judiciously, for special effects only.


Violet

Non- UV Lighting in the violet family will cause any sort of warm color to appear redder, and will make yellows and greens turn brown and muddy. Red colored make up used on the performer’s face will look very deep and unnatural, and sometimes black. Shadows under facial features (like cheek bones) will also appear dark gray or black.

Purple
Deep purple lighting effects makeup and costumes in the same way violet lighting does, only even more intensely. Any costume or prop in with blue coloring will appear violet.


Lavender

Less intense than purple or violet, a soft lavender light will make the performer appear lifelike, but with a slightly cooler cast to the tone of the flesh.

Magenta
Though an intense color on its own, careful use of magenta lighting can actually look rosy and romantic when used an accent color onstage.

Pink
Straight up pink lighting will intensify warmer colors and gray down cooler colors. For example, a lemon yellow costume will appear almost orange, and a royal blue costume may appear to be dark purple, black or gray. Red or pink lipstick or blush will appear intensified and doll-like.

Light Pink or Peach
This rich, warm color flatters most theatrical makeup, and mixed in with whites, will bring a softer look to a bright stage.

Red
Used on it’s own, red lighting will either wash out or muddy up almost any color of costume, and plays horrendous tricks with stage makeup. On the face, everything but the darkest color of make up pretty much vanishes…. in other words, you will look like a corpse! Light and medium rouges fade into the performer’s foundation make-up, whereas dark red rouges turn a rusty brown. Yellows will become orange, and the cool shaded colors turn dreary shades of gray and black.

Orange
Orange or golden-toned light will make most flesh colors turn sallow. It will also turn colors in the red or pink family even more orange. Cool colors- blues, greens, purples, will be grayed and won’t stay true.

Amber
This color is pretty much universally flattering, because it warms the skin and picks up the lively pinks and flesh tones in almost any sort of theatrical makeup, making the performer appear healthy and “life-like”.


Bastard Amber

This is a warm pinkish-golden tone that is commonly employed onstage to mimic daylight- it adds a rich,robust tone to almost any shade of skin or any kind of stage make-up, and costume colors appear bright and true. And yes...it really is called Bastard Amber!

Yellow
Yellow lighting on it’s own makes most skin tones appear sallow and sickly, and can wreak havoc on almost any color used in costuming or back drops.

Green
Another color to be careful of using too much of onstage is green. It can make performers look sick…or just plain weird! Green lighting will make all flesh tones appear white and/or gray, and reds or pinks will appear black in proportion to the intensity of the green light. Any props, sets or make up that is already green in color will be intensified, blues will become greener and yellows will appear light green.

Blue
Used by itself, blue-toned lighting will definitely gray most flesh tones and cause them to appear more red or purple, again giving a zombie-like appearance to performers. As a special effect blue light can be very interesting, but use blue lighting with caution, and as an accent, for lighting that will highlight the performers themselves.

White
Almost all colors in the spectrum tend to stay true under white lighting, as do metallics and mixed neon brights, or costumes with patterned fabric. Any sort of shiny trim or sparkling stones will gleam and twinkle insanely and supernaturally.

Though pretty much any color costume will look great under white lights, unless you mix in other colors in a wash with the white lights, most skin-tones may appear ashy or extremely pale and facial features- no matter what the age of the performer- will look rather harsh.

UNIVERSALLY FLATTERING STAGE LIGHTING
If you are unsure of what sort of lighting effects to ask for, or there is a limited amount of lighting in the venue, a nice, bright stage with a mixed wash of whites, pinks and ambers is a safe bet.

It will compliment any performer’s skin tone and show the true colors of costumes, props, sets and backdrops. These colors used together will warm up and soften white lights, and make the performers on stage look life-like and animated without looking harsh. A stage lit like this will also allow the audience’s eyes to take in a performance without being distracted.


Photo: Princess Farhana basking in a spot light, during Hollywood Music Center's "Soul Of Bellydance" DVD shoot

Monday, June 13, 2011

"BOMBSHELL" DVD HIGHLIGHTS


The "Bombshell: Dramatic Make-Up For The Stage, Photos And Glamorous Occasions" instructional stage make-up DVD is a wrap!

Our two-day shoot was quick-paced and crazy fun. There were so many pretty girls ( and lots of cosmetics) all over the place. The clean-up process was just insane. Lipstick-stained tissues, stubby eyebrow pencils, used cosmetic sponges and false eyelashes littered the floor. Our crew- cameramen Anthony Pedon and Anthony Ferrari, still photographer Dusti Cunningham were the only men around. Our make-up assistant Silvina Knight and our production assistants IrinaXara and Liz Heard were kept busy the entire time cleaning up after Devilla and me, as we did the faces of our lovely models: Jennelah, Deborah, Shauntel, Lori, Jewel, Lapis, and Lisa Marie.

Devilla and I gave instruction for eight looks total including period make-up ( 1920's, 1960's, 1950's) a section on "Glamour For The Mature Woman", two colorful fantasy looks, Arabic Eyes, Smokey Eyes and tutorials on contouring, applying false eyelashes, pretty lips, and going glitter-crazy.

The DVD will now go into post-production, and should be available by early fall 2011. It may even be available earlier. Of course, as soon as it is, i will let you know! You will be able to purchase it at www.princessfarhana.com , among other places.

The pictures are a a few of the highlights from the shoot:

#1: Devilla, model Shauntel, Princess Farhana on set

#2 Model Shauntel rocking the 1920's look, created by Princess Farhana

#3DeVilla and her model, Diamond Debbie in the "Golden Goddess" look, designed by DeVilla

#4 Princess and Model Lapis in the fantasy look created by Princess Farhana

#5 Model Jewel in the Pin Up look created by DeVilla