
As a performing dancer of any genre, you want your face to be not only beautiful and finished, but also expressive. You will want to look fabulous- with pretty doe eyes, luscious lips and have your best features maximized. In general, belly dance make-up should exotic and mysterious, but not garish- there’s a fine line here that is easy to cross. For work where you will be seen up close, such as private parties or outdoors in the daytime, like at a dance festival, you’ll definitely need more make-up than you would wear on the street. This can be as uncomplicated as rimming your eyes with liner or powder shadow a little darker and more heavily than usual, and using a brighter shade of lipstick. Of course, if you’re a major glamour-puss (like me!) you will also want to add a bindi or two, a medium-sized set of false eyelashes, and some body glitter.
However, if you are working on a large stage, or about to have professional photos done, wearing a little more eyeliner simply won’t cut it. The first thing you must remember about being onstage or in a photo studio is that the lights will wash out your features. You may have on a spectacular costume and be dancing beautifully, but without make-up (or with "every day" make-up) your face will appear almost blank. The basic look gone over here will enhance your features and also work well with dim lighting, the kind you may encounter while dancing in a restaurant or nightclub. For black and white photos you can really pile it on; with color photos you need a slightly more subtle approach. This look may seem heavy and almost clown-like up close, but on stage or under harsh studio lights, your face will look natural, yet intense, with your features accented.
For stage and studio work, you will definitely want to wear foundation make-up, or a combination powder/foundation, because it will make your complexion appear poreless and perfect. Sheer formulas are not good or strong enough to achieve this effect- you will need a very opaque, full-coverage type of foundation to get the desired effect. In general, you would select a foundation color by matching it as closely to your own skin tone as possible. Try foundation samples on the inside of your arm, this skin tone is very close to the color of your face. For stage work, many performers like to use a foundation that is a shade or two darker than their natural skin tone, because it makes their face appear brighter and more robust under the harsh stage lights. If you are unsure what color to pick, consult with a make-up artist at a department store cosmetics counter.
To apply your foundation, use a sponge edge or clean fingers to daub the make-up onto your face, and blend it well, making sure to extend the blending onto the sides of the cheeks, chin, and onto the neck, so you don’t have a discolored, de-markation line where the foundation ends and your natural skin tone begins. Press translucent or similarly toned powder onto your face to set the foundation, and wait a few minutes for it to set before applying any other make-up. Before applying eye make-up, a pro trick is to sprinkle a good amount of translucent powder or even baby powder on the cheeks, directly under the eyes.
This will catch any “migrating’ pigments from the eye shadow you are about to apply. When you are done with your maquillage, simply blow or brush away the excess powder for a flawless finish.
BASIC DANCE MAKE-UP FOR STAGE AND PHOTOS
#1) Cover entire eye area (lid and upper lid) with beige, white or ivory shadow.
#2) Lightly pencil in brows (with short, feathery strokes, not harsh lines) and extend outward and upwards.
#3) Accentuate the hollows at the inside corner of your eye with a light brown shadow. (This step may be eliminated if you have large eyes with big lids)
#4) Use dark brown shadow or gray in the crease of the eye, and, if you like, extend it in a sweeping wedge outwards and up at the outside corner for a cat-like slant.
#5) Smudge a "V" shape of black or dark grey shadow in outer corner of eye.
#6) Softly line under the eye in back or gray shadow. Dark blue also may be used; it makes whites of the eye appear whiter. Smudge shadow so the line is not harsh.
#7) Apply black mascara to top lashes. Brown might be ok for every day but black is much better for stage and photos. Instead of mascara, which will run if you sweat while dancing, you may wish to apply false eyelashes. Most professional dancers eschew mascara altogether and use faux lashes.
“ But wait!” I can hear your panicked cry, “I haven’t the foggiest notion of how to apply false eyelashes!”
Never fear! I was taught to apply false eyelashes by (who better?) a professional drag queen! After a simple demo, I mastered the art of faux-lash application and have never looked back. It’s easier than you might think, too.
The first things you will need to do are look at the lashes, and determine which is for the left eye, and which is for the right. Yes, eyelashes are made differently, with the smaller, shorter hairs meant for the inside corner of the eye. Next, trim the lash (at the inside end) to fit your eyes. Some of us have long, almond-shaped eyes; others have eyes that are slightly rounder in shape. False lashes are meant for everyone, so most are too long, on purpose length-wise.
After you’ve trimmed the lashes, apply a thin band of glue to the base of the false lash, and let it sit for at least 30 seconds, - more like a full minute or two, until glue is tacky. The brand of the glue, or the amount you put on the lash will determine how quickly it dries. My drag queen pal used to give me this sage advice:
“ Girl, you put the glue on your eyelash. Then you walk your ass into the kitchen, and pour yourself a nice cocktail. Wander over to your closet, open the door, and think about what stunning outfit you’re going to wear. Then you take a sip of that cocktail, and figure out what jewelry will go with your dress. …Then you take a few more sips of that cocktail, til it’s almost half gone. When you’re thinkin’ ‘bout finishing that cocktail…. And only THEN… you pick up your lash, and put it on! And, honey, repeat every step for the other side!
Cocktails or not- it was good advice. The main reason most gals have a problem with applying false eyelashes is that they try to stick the lashes on when thy are too wet, which can result in slippage, or worse- actually gluing your eyelids together!
I recommend "DUO" glue in clear/white, it’s my favorite because it holds well and is the least irritating of any brand I've used. Using clear glue, by the way, is better, because it dries invisibly. If you use the dark-toned glue, it can make mistakes look very obvious. When you are ready to apply the lash, sit it on your upper eye-lid, just above your natural lash-line. Press down lightly in the middle first, and then tap the lash down lightly towards inner and outer corners. Keep your eye closed for a moment, to let the glue take hold. And back to the rest of your make-up…
#8) Finish the eye by lining the top lid with liquid eyeliner, or smudge some black pencil over the lash-line. It will hide any visible glue. If you are using big, thick lashes, you won’t even need to do this.
#9) A nice touch is to apply pearly white or light silver shadow in the inside corners, just over the tear-ducts, to open the eyes.
#10) for more glamour in a live show, lightly sprinkle glitter just under brows, or apply with a finger or paint on with eyeliner sealer to make the entire area sparkly, being careful not to get any INTO your eye. Opt against the glitter if you are doing a photo session. On film it doesn’t appear sparkly, just grainy.
#11) Rhinestones or sequins may be glued onto outer corner of eye for a flashy fantasy effect. This looks great onstage, but in photos it may appear as a white blur that will look like a scratch on the negative, so it's not recommended for pictures. To glue the stones or sequins on, simply apply a tiny dot of lash glue to the back of the decoration and stick it on where you want it.
12) For bee-stung, "kissable" lips, apply lipstick and blot with a tissue, then draw an outline with pencil just over the lip-line on your lower lip, to make it appear fuller. A small dot of white or gold eye shadow in the center of the lower lip makes it look even fuller. On stage for a natural look, use, beige or pinkish- nude lipstick outlined with mauve, purple or brown liner. Up close, it will look weird, but it looks like plump, kissable lips from far away.
13) Contour just under cheekbones and jaw line with light brown shadow or blush, blend well. Apply a pinkish color on the "apples" of your cheeks for color, especially on stage. To find the “apple”, smile at yourself in the mirror. Start with a minimal amount of color, and build from there.
14) Powder your face to set make up, either with a puff or cotton ball, and you're good to go! Make sure you bring your make up bag along for touch ups.
15) Remember to take off ALL your make-up before going to sleep!
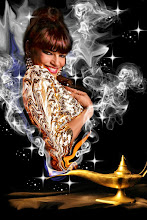
PHOTO BY DON SPIRO


Thanks for the great make up tips Plez! I'm going to share this with the rest of the gals in the troupe. :)
ReplyDeletei have started using your make up tips, and EUREKA!! my makeup looks even better!!
ReplyDelete